%%capture
! pip install -U ovito
! pip install imageioRecipe 4: Recreating turntable animation of a model
How to Script with OVITO
If you look at the tutorials on the GUI OVITO documentation you find a tutorial showing how to create a turntable animation of a model. If you have access to the Pro OVITO version, they generating the script to batch run this process on several different structures is very straightforward. However, if you only have the Basic OVITO version, you cannot. Therefore having using SOVITO is the only option.
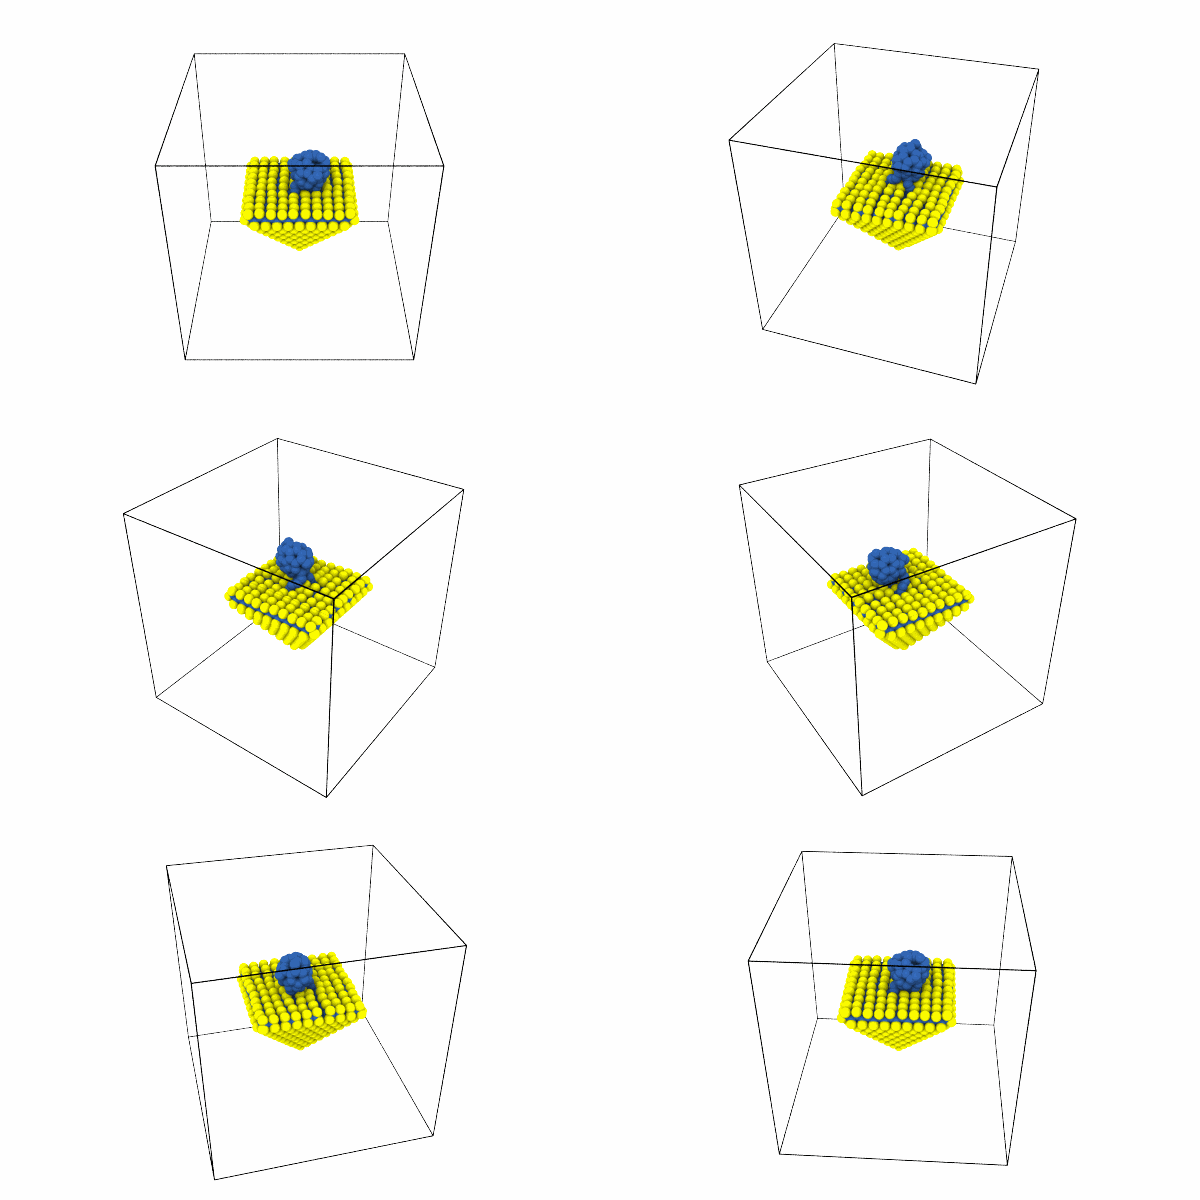
In this notebook we are going to recreate almost the same animation but by scripting from scratch.
Import OVITO Modules
from ovito.io import import_file
from ovito.modifiers import AffineTransformationModifier
from ovito.pipeline import StaticSource, Pipeline
from ovito.modifiers import PythonScriptModifier
from ovito.vis import TachyonRenderer
from ovito.vis import Viewport
import numpy as np
from imageio.v3 import imread
from imageio import mimsave
import os
Step 1: Remote import file
In previous tutorials I used command line wget to download the file, however, the import_file function has the ability to do remote fetch simply by using a url
We import the file and then get the data via the compute method of the pipeline for the frame of interest.
remote_file = "https://gitlab.com/ovito-org/ovito-sample-data/-/raw/04f075def623f25ae1a2d8363a4dcf6e90a0f91a/NetCDF/C60_impact.nc"
pipeline=import_file(remote_file,input_format="netcdf/amber")

nframes = pipeline.source.num_frames
data = pipeline.compute(nframes)
Step 2: Static pipeline
Now we create a new, static, pipeline from the data object.
static_pipeline = Pipeline(source=StaticSource(data=data))
static_pipeline.add_to_scene()
Some code for color coding (optional)
Just so that the rendered turnable animation is similar to the original version, I’m adding some code here to modify the particle color based on the atomic number, Z.
color_map = {
    1: (1.0, 1.0, 0.0),  # Yellow for Z=1
    6: (0.2, 0.4, 0.7)   # Blue for Z=6
}

def color_particles_based_on_z(frame, data):
    if 'Color' not in data.particles.keys():
        data.particles_.create_property('Color',
                                        data=np.zeros((data.particles.count, 3),
                                                      dtype=np.float32),
                                                      )
    # Access the atomic number property
    z_property = data.particles['Z'].array
    colors = data.particles['Color'].marray

    # Assign colors based on atomic number using the color map
    for z, color in color_map.items():
        mask = (z_property == z)
        colors[mask] = color


static_pipeline.modifiers.append(PythonScriptModifier(function=color_particles_based_on_z))
Step 3: Translating center of rotation
As with the GUI OVITO tutorial, we need to move the rotation center via the AffineTransformationModifier. We specify this translation using the transformation matrix kwarg, where the last column is the translation vector.
transformation_matrix = [[1.0, 0.0, 0.0, -0.5],
                         [0.0, 1.0, 0.0, -0.5],
                         [0.0, 0.0, 1.0, -0.5]]
static_pipeline.modifiers.append(AffineTransformationModifier(
    transformation=transformation_matrix,
    reduced_coords=True,
    )
)

static_pipeline.compute();
Step 4: Prepare Viewport
One key difference in the approach used in the GUI OVITO implementation, is we cannot use[^1 At least to my knowledge.] the Viewport.render_anim call because we are not rendering simulation scenes but are just take snapshots of a single scene with a different camera location. Thus we need to write a function to adjust the viewport as we desire. My approach just uses a rotation angle in the x-y plane and then a fixed angle in the azimuthal direction. The distance from the origin is set by r which you can change based on your need.
I’m not sure the field of view variable fov does anything here, since it appears this doesn’t mean anything for a Perspective type of view.
viewport = Viewport(fov=30)
viewport.type = Viewport.Type.Perspective

def update_camera_settings(frame, total_frames, r=125):
    angle = (frame / total_frames) * 2 * np.pi

    # Calculate the new camera position for the circular orbit
    rx = r * np.sin(angle)
    ry = r * np.cos(angle)
    rz = r / np.sqrt(2) # Camera at 45 degree in z-azimuthal
    camera_pos = (rx, ry, rz)

    dir_vector = (-camera_pos[0], -camera_pos[1], -camera_pos[2])
    # Normalize the direction vector
    magnitude = np.linalg.norm(dir_vector)
    camera_dir = (dir_vector[0]/magnitude, dir_vector[1]/magnitude, dir_vector[2]/magnitude)

    return camera_pos, camera_dir
Step 5: Render Animation of scene
The key difference in this animation is that we are moving the camera around the static scene/frame to generate the perspective of a rotating object. To achieve this we loop over the number of camera positions (i.e., animation length) update the camera position and direction vector, render the scene to a temporary image file, and then use the imageio package to create an animation from all the rendered scenes.
animation_length = 100
renderer = TachyonRenderer(
    ambient_occlusion=True,
    ambient_occlusion_brightness=0.8,
    antialiasing=True,
    antialiasing_samples=64,
    direct_light=True,
    direct_light_intensity=0.9,
    shadows=True,
    depth_of_field=False,
    focal_length=40.0,
    aperture=0.01
)
image_paths = []

for frame in range(animation_length):
    camera_pos, camera_dir = update_camera_settings(frame, animation_length)
    viewport.camera_pos = camera_pos
    viewport.camera_dir = camera_dir

    filename = f"temp_frame_{frame:04d}.png"
    image_paths.append(filename)  # Store for later deletion
    viewport.render_image(filename=filename, size=(600, 400), renderer=renderer)

# Create a GIF from the images
gif_filename = 'recipe4_animation.gif'
images = [imread(filename) for filename in image_paths]
mimsave(gif_filename, images, fps=25, loop=0)

# Delete the temporary images
for filename in image_paths:
os.remove(filename)try:
import google.colab
from IPython.display import Image
Image(open(fname, 'rb').read())
except ImportError:
"Assuming local run."
A few things to note:
- The perspective view is a little different from that shown in the original mainly because I’m not exactly sure the settings of the camera. You will need to adjust the settings based on your data.
- In my opinion this recipe may bit a bit unessecary, because with OVITO 3.10 and above you can use the glTF format which creates 3D models that can be animated to rotate and are manipulatable. Furthermore, you can use the
ovito_to_asecall to create an ASE Atoms object and then use ASE io to save to html and use X3DOM (Bringuier 2024).
References
Citation
@online{bringuier2024,
  author = {Bringuier, Stefan},
  publisher = {Github Pages},
  title = {Recipe 4: {Recreating} Turntable Animation of a Model},
  date = {2024-02-29},
  url = {https://stefanbringuier.github.io/HowToSOVITO},
  langid = {en}
}